Learn how to measure the performance of your Java code using JMH (Java Microbenchmark Harness) by writing and running benchmarks locally and continuously in CI to catch regressions.
This guide uses
JMH (Java Microbenchmark Harness), the
standard benchmarking framework for the JVM. JMH is developed as part of the
OpenJDK project by the same engineers who build the JVM itself, so it
understands JVM internals like JIT compilation, dead code elimination, and
constant folding that can silently invalidate naive benchmarks. It handles
warmup, fork isolation, and statistical analysis out of the box so you can focus
on writing the code you want to measure.
This guide covers Maven and
Gradle. JMH also works with
SBT.
The recommended way to use JMH with Maven is through its archetype, which
generates a project pre-configured with the annotation processor and
uber-JAR packaging:
This creates a my-benchmarks/ directory with the following structure:
my-benchmarks
pom.xml
src/main/java/com/example
MyBenchmark.java
The generated pom.xml includes jmh-core (the runtime library),
jmh-generator-annprocess (the annotation processor that generates
benchmark harness code at compile time), and maven-shade-plugin (packages
everything into a single executable benchmarks.jar).
plugins { id 'java' id 'me.champeau.jmh' version '0.7.3'}repositories { mavenCentral()}jmh { jmhVersion = '1.37'}
Then create the benchmark source directory:
terminal
mkdir -p src/jmh/java/com/example
my-benchmarks
build.gradle
src/jmh/java/com/example
MyBenchmark.java
The plugin handles the annotation processor and uber-JAR generation
automatically.
Do not add jmh-core to an existing project without the annotation processor.
JMH needs to generate synthetic benchmark code at compile time. The archetype
(Maven) and plugin (Gradle) handle this correctly.
The archetype generates a stub MyBenchmark.java with an empty @Benchmark
method. Open src/main/java/com/example/MyBenchmark.java and replace its
contents with:
src/main/java/com/example/MyBenchmark.java
package com.example;import org.openjdk.jmh.annotations.Benchmark;public class MyBenchmark { @Benchmark public long fibonacci() { return fibonacci(30); } static long fibonacci(int n) { if (n <= 1) return n; return fibonacci(n - 1) + fibonacci(n - 2); }}
That’s it. @Benchmark is the only annotation you need. JMH generates the
measurement harness around it. The method returns its result, which prevents
the JVM from eliminating the computation as dead code (more on this in
avoiding common pitfalls).
cd my-benchmarksmvn clean verifyjava -jar target/benchmarks.jar
terminal
cd my-benchmarks./gradlew jmh
This will take about 8 minutes. JMH defaults are thorough: 5 forked JVMs,
each running 5 warmup + 5 measurement iterations of 10 seconds. For a faster
first run, add flags to reduce the iteration count:
# JMH version: 1.37# VM version: JDK 17.0.18, OpenJDK 64-Bit Server VM, 17.0.18+8-Debian-1deb12u1# Warmup: 5 iterations, 10 s each# Measurement: 5 iterations, 10 s each# Threads: 1 thread, will synchronize iterations# Benchmark mode: Throughput, ops/time# Benchmark: com.example.MyBenchmark.fibonacci# Run progress: 0.00% complete, ETA 00:08:20# Fork: 1 of 5# Warmup Iteration 1: 320.348 ops/s# Warmup Iteration 2: 321.605 ops/s# Warmup Iteration 3: 323.393 ops/s# Warmup Iteration 4: 323.038 ops/s# Warmup Iteration 5: 321.964 ops/sIteration 1: 320.996 ops/sIteration 2: 320.143 ops/sIteration 3: 323.586 ops/sIteration 4: 322.946 ops/sIteration 5: 321.108 ops/s# Run progress: 20.00% complete, ETA 00:06:40# Fork: 2 of 5...Benchmark Mode Cnt Score Error UnitsMyBenchmark.fibonacci thrpt 25 320.479 ± 1.013 ops/s
Without any configuration, JMH automatically warmed up the JIT compiler across 5
separate JVM processes, collected 25 measurement iterations (5 per fork), and
computed a tight 99.9% confidence interval. The default mode is Throughput
(thrpt), measured in operations per second.
Understanding the results:
Mode: The benchmark mode (thrpt = throughput, operations per second).
Cnt: Total measurement iterations across all forks (5 forks x 5 iterations
= 25).
Score: The measured value (higher is better for thrpt).
Error: The 99.9% confidence interval margin. The true value lies within
Score ± Error with 99.9% confidence.
The previous benchmark used all JMH defaults. In practice, you want to embed
settings into your benchmark class using annotations. This makes benchmarks
self-describing and reproducible regardless of how they are invoked.Update MyBenchmark.java:
src/main/java/com/example/MyBenchmark.java
package com.example;import org.openjdk.jmh.annotations.*;import java.util.concurrent.TimeUnit;@BenchmarkMode(Mode.AverageTime)@OutputTimeUnit(TimeUnit.MILLISECONDS)@State(Scope.Thread)@Fork(1)@Warmup(iterations = 3, time = 1)@Measurement(iterations = 5, time = 1)public class MyBenchmark { private int n = 30; @Benchmark public long fibonacci() { return fibonacci(n); } static long fibonacci(int n) { if (n <= 1) return n; return fibonacci(n - 1) + fibonacci(n - 2); }}
Rebuild and run. No flags needed, everything is in the annotations:
The output now shows avgt (average time) in ms/op. A single fork completed
in seconds instead of minutes. Computing fibonacci(30) takes about 3.1
milliseconds.The following sections break down each annotation.
Samples individual operation times and reports percentiles (p50, p90, p99,
p99.9). Use this to understand tail latency, not just the average.
Particularly useful because it reports percentiles directly:
This reveals that while the median latency is 38ns, the p99.99 is 3.2
microseconds, an 84x spike. Percentile data like this is invaluable for
understanding real-world latency characteristics.
Measures the time for a single invocation with no warmup. Use this to
benchmark cold-start performance and one-shot initialization costs.
You can pass an array to run multiple modes in one benchmark run, e.g.,
@BenchmarkMode({Mode.Throughput, Mode.AverageTime}). Use Mode.All to run
every mode at once, which is useful for exploratory benchmarking.
@State marks a class as a holder for benchmark data. Without it, you cannot
use instance fields in benchmark methods. The Scope parameter controls how
state is shared:
Controls how many separate JVM processes to run. Forks run sequentially,
not in parallel. Each fork starts a fresh JVM, isolating profile-guided
optimizations and JIT compilation state. Use jvmArgs to control heap size,
GC settings, and other JVM flags. Use jvmArgsPrepend or jvmArgsAppend to
add flags without replacing defaults.
Controls how many iterations run before measurement begins, giving the JIT
compiler time to optimize your code to steady state. Parameters: iterations,
time, timeUnit.
@Warmup(iterations = 5, time = 2, timeUnit = TimeUnit.SECONDS)
@Threads controls how many threads run the benchmark concurrently. The
default is 1. Combined with Scope.Benchmark, this is
how you measure contention:
Multi-threaded benchmark
@Threads(4)@State(Scope.Benchmark)public class ConcurrencyBenchmark { private ConcurrentHashMap<Integer, Integer> map = new ConcurrentHashMap<>(); @Benchmark public Integer concurrentPut() { return map.put(Thread.currentThread().hashCode(), 42); }}
Use @Threads(Threads.MAX) to use all available processors.
The previous examples all used a single input value (30). But what if you want
to see how performance changes with different input sizes? This is where
@Param comes in.
The results clearly show the exponential O(2^n) growth of recursive Fibonacci:
going from n=5 (13 nanoseconds) to n=30 (3.1 milliseconds), a factor of
240,000x.
You can override @Param values from the command line without recompiling:
Each @Param annotation applies to a single field, but you can use multiple
@Param fields to benchmark across several dimensions. JMH runs all
combinations automatically:
Multiple @Param fields
@Param({"1000", "10000"})private int size;@Param({"ArrayList", "LinkedList"})private String listType;
This produces four benchmark runs: 1000/ArrayList, 1000/LinkedList,
10000/ArrayList, 10000/LinkedList.
package com.example;import org.openjdk.jmh.annotations.*;import java.util.concurrent.TimeUnit;@BenchmarkMode(Mode.AverageTime)@OutputTimeUnit(TimeUnit.MICROSECONDS)@State(Scope.Thread)@Fork(1)@Warmup(iterations = 3, time = 1)@Measurement(iterations = 5, time = 1)public class AlgorithmComparison { @Param({"10", "20", "30"}) private int n; static long fibRecursive(int n) { if (n <= 1) return n; return fibRecursive(n - 1) + fibRecursive(n - 2); } static long fibIterative(int n) { if (n <= 1) return n; long a = 0, b = 1; for (int i = 2; i <= n; i++) { long temp = a + b; a = b; b = temp; } return b; } @Benchmark public long recursive() { return fibRecursive(n); } @Benchmark public long iterative() { return fibIterative(n); }}
The iterative version computes fibonacci(30) in 6 nanoseconds while the
recursive version takes 3.1 milliseconds: over 500,000x faster. This is the
power of parameterized benchmarks: they make algorithmic trade-offs visible at a
glance.
Sometimes you have expensive setup that should not be included in your benchmark
measurements. For example, generating test data or loading files. JMH provides
@Setup and @TearDown annotations with different Level options to control
when fixture methods run.
Runs before and after each individual method call. Use sparingly - this adds
overhead on every invocation.
Level.Invocation adds timing overhead on every call. Only use it when the
benchmark method is slow enough (milliseconds or more) that the fixture cost is
negligible in comparison.
Here is an example using Level.Iteration to provide fresh unsorted data for
each iteration of a sorting benchmark:
src/main/java/com/example/SortBenchmark.java
package com.example;import org.openjdk.jmh.annotations.*;import java.util.concurrent.TimeUnit;import java.util.ArrayList;import java.util.Collections;import java.util.List;import java.util.Random;@BenchmarkMode(Mode.AverageTime)@OutputTimeUnit(TimeUnit.MICROSECONDS)@State(Scope.Thread)@Fork(1)@Warmup(iterations = 3, time = 1)@Measurement(iterations = 5, time = 1)public class SortBenchmark { @Param({"1000", "10000", "100000"}) private int size; private List<Integer> data; @Setup(Level.Iteration) public void setUp() { // Regenerate unsorted data before each iteration Random random = new Random(42); data = new ArrayList<>(size); for (int i = 0; i < size; i++) { data.add(random.nextInt(size)); } } @Benchmark public List<Integer> sortList() { List<Integer> copy = new ArrayList<>(data); Collections.sort(copy); return copy; }}
This adds GC metrics to the output, showing bytes allocated per operation
(gc.alloc.rate.norm) and GC event counts, essential for understanding
allocation-heavy code.
The JVM is a sophisticated optimizing runtime. Without care, it can silently
eliminate or transform the code you are trying to measure, producing misleading
results. JMH is designed to help, but you still need to follow certain patterns.
If a computation’s result is never used, the JIT compiler may eliminate it
entirely:
Dead code elimination
// BAD: result is discarded, JVM may eliminate the entire computation@Benchmarkpublic void measureWrong() { Math.log(x);}// GOOD: returning the result prevents dead code elimination@Benchmarkpublic double measureRight() { return Math.log(x);}
JMH automatically consumes the return value of @Benchmark methods through an
internal Blackhole, preventing elimination. Always return your computed
result.
Never write manual loops inside benchmark methods. The JVM aggressively
optimizes loops. It unrolls, pipelines, and hoists invariant computations out of
them, producing unrealistically low per-operation numbers:
Manual loops
// BAD: JVM optimizes the loop, results are misleading@Benchmarkpublic int measureWrong() { int sum = 0; for (int i = 0; i < 1000; i++) { sum += compute(i); } return sum;}// GOOD: let JMH control the iteration@Benchmarkpublic int measureRight() { return compute(x);}
JMH handles iteration internally with proper safeguards. Trust the framework.
The JVM is non-deterministic. Profile-guided optimizations, garbage collection,
and thread scheduling vary between runs. A single fork can give misleading
results. Use multiple forks (see @Fork) to capture this
variance:
Fork configuration
// For development, 1 fork is fine for fast feedback@Fork(1)// For reliable measurements, use 3-5 forks@Fork(5)
Each fork starts a fresh JVM, isolating profile-guided optimizations and giving
JMH enough data points to compute meaningful confidence intervals.
Use fixed seeds in your @Setup methods for random number
generators:
Deterministic setup
// BAD: different data every run, results are not reproducible@Setup(Level.Trial)public void setUp() { Random rng = new Random(); // non-deterministic seed // ...}// GOOD: fixed seed, results are reproducible@Setup(Level.Trial)public void setUp() { Random rng = new Random(42); // deterministic seed // ...}
Include assertions in your setup or dedicated test methods to ensure you are
benchmarking correct code, not broken code that happens to be fast:
Correctness check
@Setup(Level.Trial)public void setUp() { // Verify the algorithm is correct before measuring it if (fibonacci(10) != 55) { throw new IllegalStateException("fibonacci(10) should be 55"); }}
Sorted or regular data can exploit hardware optimizations like branch prediction
and cache prefetching, giving misleadingly good results. Use representative data
that matches your production workload.
Here’s how to integrate CodSpeed with your JMH benchmarks:
CodSpeed integrates with JMH through a custom fork. Before configuring CI,
follow the Java integration reference to add the fork as a
Maven or Gradle dependency.
1
Set Up GitHub Actions
Create a workflow file to run benchmarks on every push and pull request.
.github/workflows/codspeed.yml
name: CodSpeed Benchmarkson: push: branches: - "main" # or "master" pull_request: # `workflow_dispatch` allows CodSpeed to trigger backtest # performance analysis in order to generate initial data. workflow_dispatch:jobs: benchmarks: name: Run benchmarks runs-on: ubuntu-latest permissions: # optional for public repositories contents: read # required for actions/checkout id-token: write # required for OIDC authentication with CodSpeed steps: - uses: actions/checkout@v5 - name: Set up Java uses: actions/setup-java@v4 with: java-version: '21' distribution: 'temurin' - name: Build benchmarks run: | cd benchmarks mvn clean verify -q - name: Run the benchmarks uses: CodSpeedHQ/action@v5 with: mode: walltime run: java -jar benchmarks/target/benchmarks.jar
2
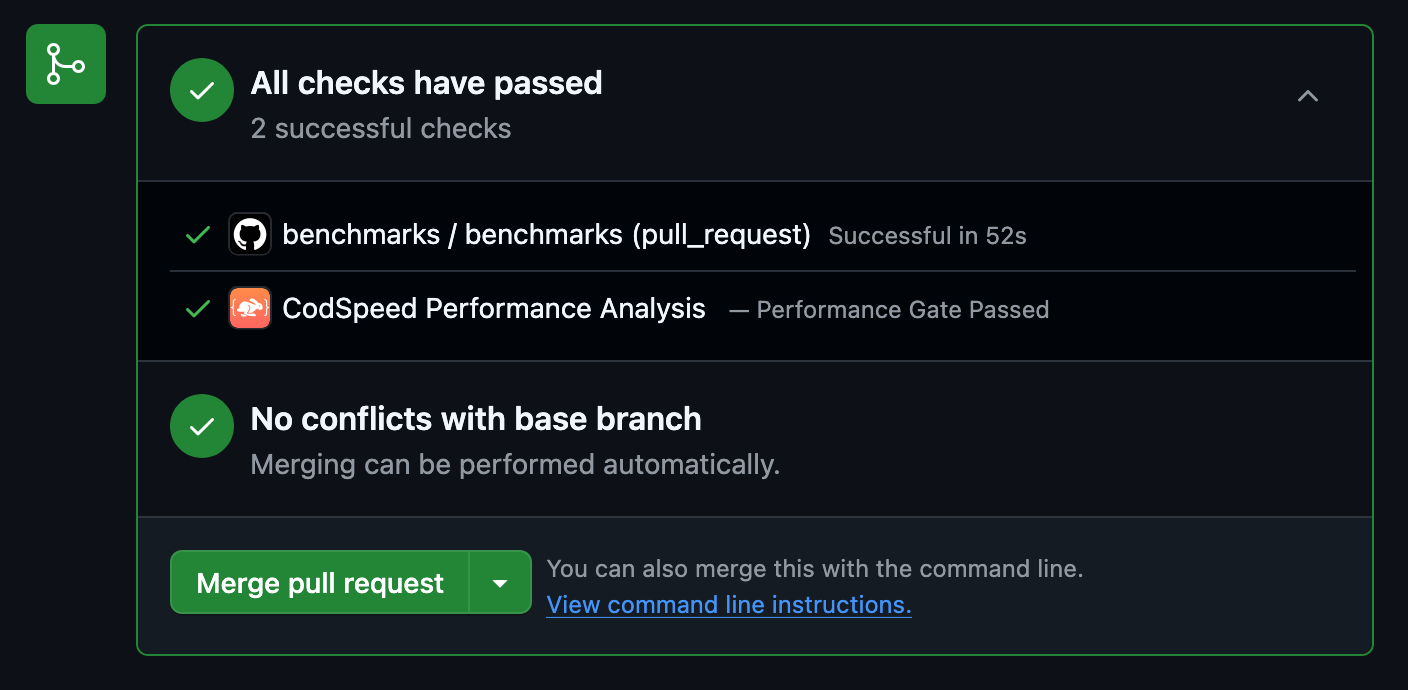
Check the Results
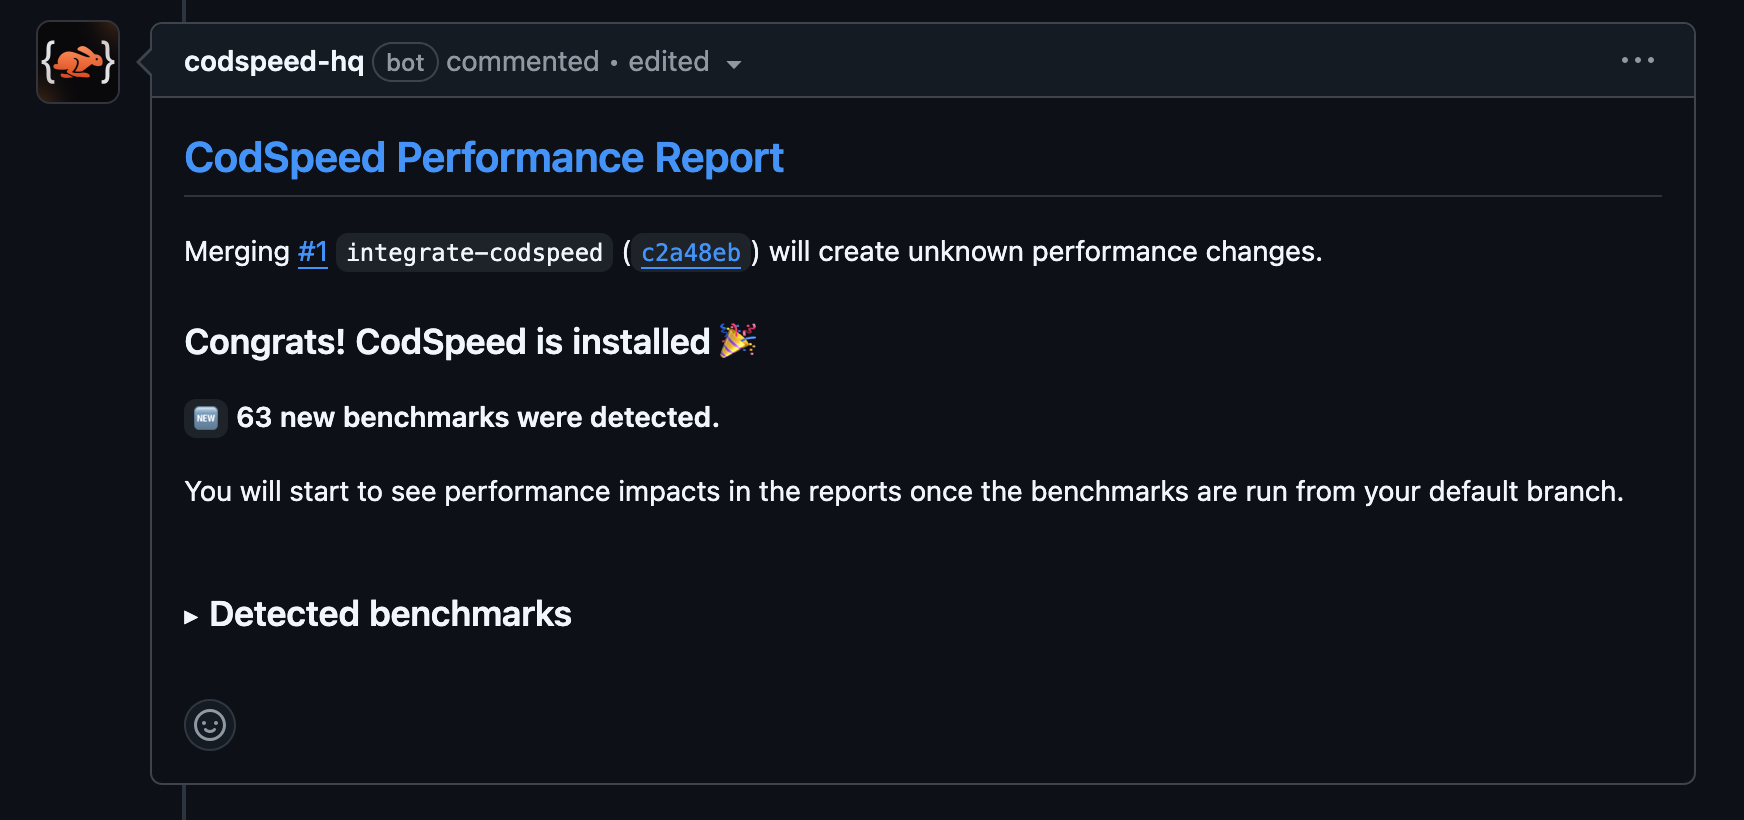
Once the workflow runs, your pull requests will receive a performance report
comment:
3
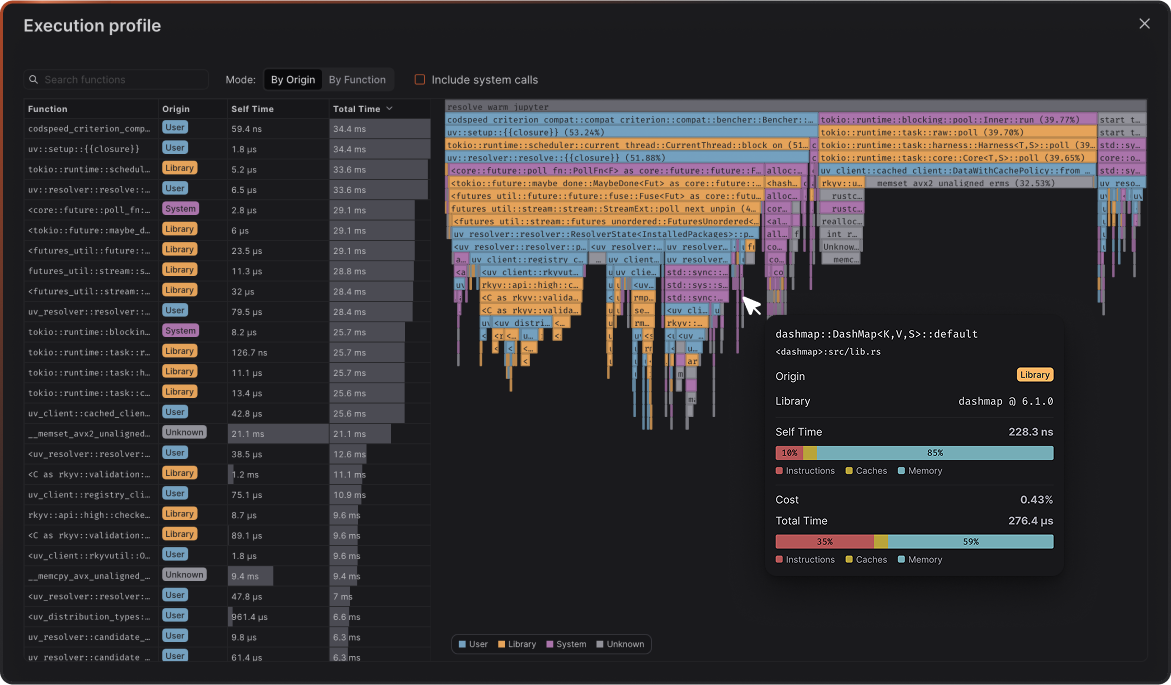
Access Detailed Reports and Flamegraphs
After your benchmarks run in CI, head over to your CodSpeed dashboard to see
detailed performance reports, historical trends, and flamegraph profiles for
deeper analysis.